


Affiliate Disclosure As an Amazon Associate I earn from qualifying purchases. This post may contain affiliate links. For more details, refer to my Disclaimer page.
A quick and simple rye loaf with a sweet flavour. This yeast based honey and oat loaf will accompany many varieties of pickles, cheeses and preserves.
This is a recipe for a honey and oat rye loaf which is a healthy and simple bread to have as an alternative to regular white bread. This post takes you through the benefits of the ingredients and shows you how to bake it.
Introduction
This bread recipe for a honey and oat rye loaf offers a tasty and slightly sweeter bread to a regular white loaf. The honey and oats are a breakfast time staple in many households. The rye flour gives more substance to the loaf and means it might keep you fuller for longer.
I really like to make this bread with the intent of toasting it at a later date. It works really well on it's own with butter, or even some runny honey on the top at the time of serving.
Instructions
- Step 1: In a jug or bowl mix together the yeast, water, honey and syrups together and set aside. Use water which is around 30℃ in temperature (luke warm) to allow the yeast to begin waking up.
- Step 2: In another bowl, incorporate the flour and the rest of the dry ingredients. Mix these dry ingredients together to combine them before step 3.
- Step 3: Pour the wet mix gradually into the dry mix and combine together using a spatula or a Danish dough whisk.
- Step 4: Knead for long enough to get a smooth dough forming. If using a stand mixer with a dough hook attachment, this should be no longer than 2 lots of 5 minutes.
- Step 5: Once incorporated, cover the bowl with a shower cap or damp cloth and let it rise until just under double in size. This will take around 1 hour to 1 hour 30 minutes (always depending on climate and ambient temperature). The warmer your house is, the quicker it will rise. This is the 'first prove'.
- Step 6: Once risen for the first prove, remove from the bowl, knock back the air out of it and then shape the dough accordingly. For more information on shaping dough take a look at my ultimate guide to bread baking for hints and tips.
- Step 7: Place the shaped dough in the proving basket or greased bread tin. Cover again with a damp cloth or shower cap. Let it rise for another 30 mins to an hour until proved, again waiting for the dough to have a slight shine to it and have almost doubled in size again. This is the second and final prove.
At this point, preheat your oven to 200℃/390F.
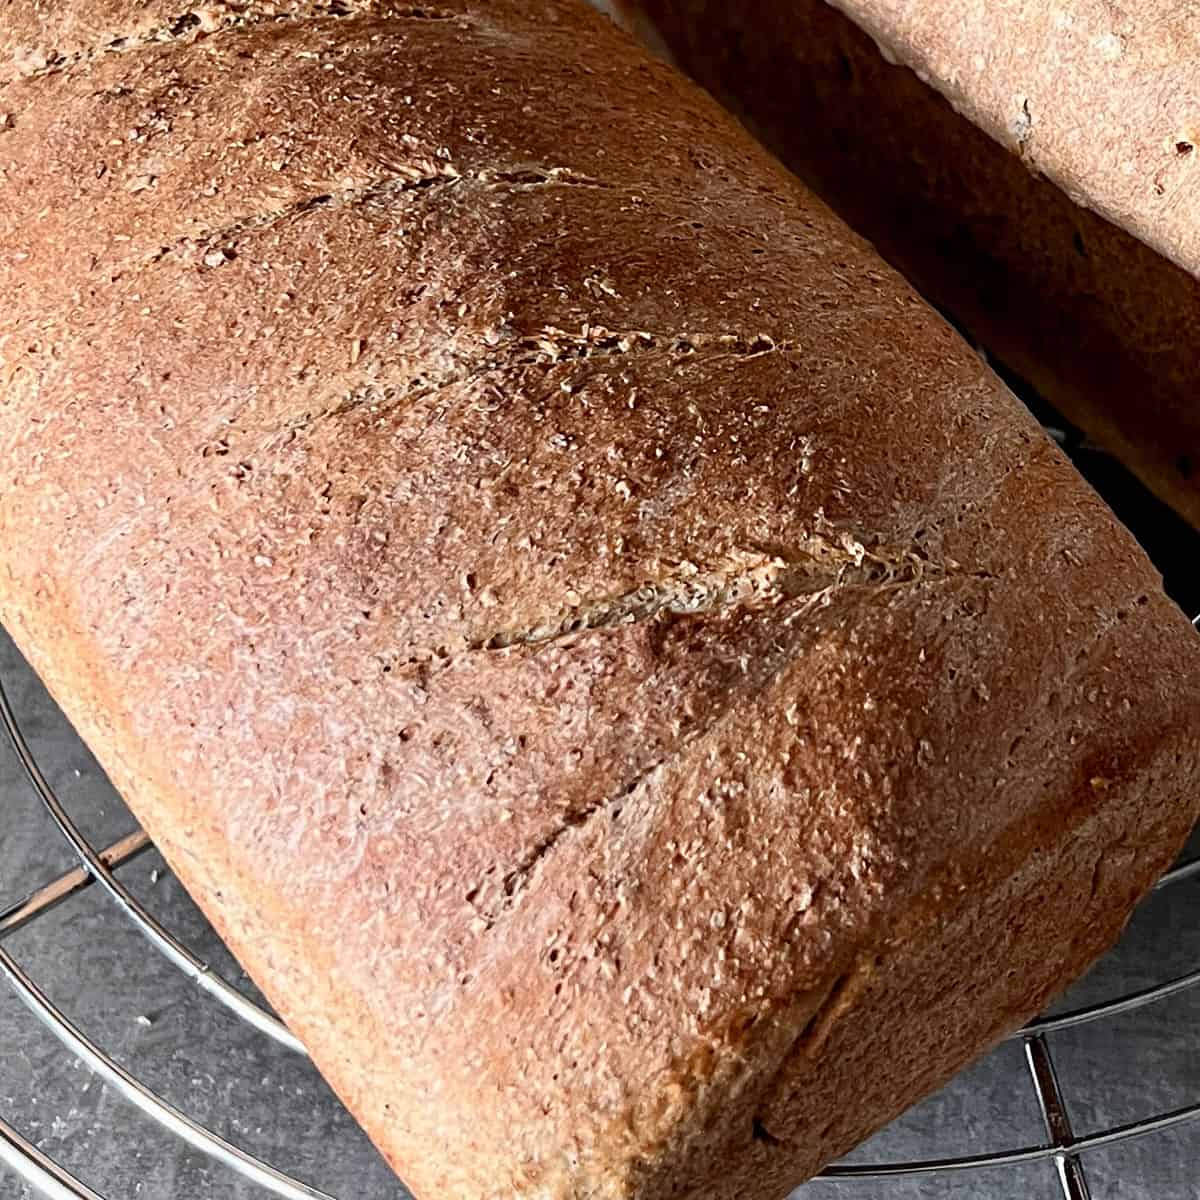
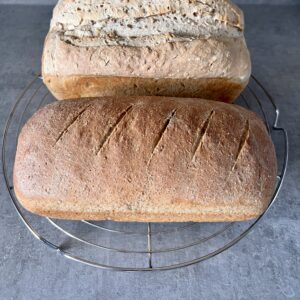
- Step 8: Once the second prove is completed, slice 4 to 5 slashes across the top of the bread prior to cooking in the oven at 200℃ for 25 - 30 minutes. If you are using a loaf tin, bake directly on the shelf in the tin. If you have proved in a proving basket, transfer this to a baking stone in the oven to bake the loaf.
Once baked, remove from the tin leave to cool on a cooling rack.
Top Tip
For your bread tins, I really am a fan of these new Prestige UK Aerolift loaf tins. They have a bumped base to allow more air to circulate at the bottom of the loaf allowing for a better crust.
Alternatives
You can make a long and slower fuller flavour by replacing the yeast with a sourdough starter and increasing the proving time to allow natural fermentation. Usually this will be at least 5 hours, or overnight in the fridge.
The sourdough started will take the place of the yeast and naturally raise the bread. Some consider sourdough leavened bread to be a heathier alternative to yeast based breads however I don't have a huge opinion either way.
I know friends who struggle with digesting yeast breads and natural sourdough sits better in their stomach being kinder to their gut health. However I'd just recommend seeing what works for you.
Storing the bread
This honey and oat rye loaf can be a little drier than other breads if left out for more than a day. Therefore it is recommended to freeze the loaf if you are not going to eat it the same day.
There are lots of yeast recipes to try where you can switch ingredients so try some of these in my yeast breads section.
FAQ
Slashing the bread allows the steam to escape from within the dough when being baked. Failing to slash the bread may cause the dough to expand in another part of the loaf. Adding the slash allows you to determine where the expansion happens.
Yes, for this recipe it is possible to use another 3 tablespoons of honey in place of the maple syrup.
When you use rye flour the absorption of the flour can be more than regular bread flour. This means that it will take more water to form a perfect dough. The amounts in this recipe work most of the time but varieties of flour (both rye and bread flour) will require varying levels of liquid. Some take more, some less.
The key to getting it right is to add water a tablespoon at a time, leaving enough time between kneads to let it absorb in.
Kneading Tips
I'd recommend taking your time when kneading bread as this is the key part of a recipe to get the gluten to build up. With a honey and oat rye bread the mix can be quite dry and therefore need more water during the kneading process. If the mix seems too dry, add water a table spoon at a time while allowing enough time between tablespoons for the water to take effect.
I would advise adding a tablespoon, then continue to knead for 30 seconds and see if that improves. You are aiming to end up with a dough which resists kneading and starts to "fight back" - one which can hold shape and not flop on the counter when left alone.
Other breads to try

The Recipe

Honey & Oat Rye Loaf
Equipment
- 1 Proving basket optional
- 1 Bread tin optional
Ingredients
- 300 grams Strong white bread flour
- 200 grams Dark rye flour
- 7 grams Yeast
- 25 grams Porridge oats adjust to suit
- 275 ml Water lukewarm water is best
- 1 teaspoon Salt
- ½ tablespoon Mixed spice
- 3 tablespoon Honey Use 6 if you have no syrup
- 3 tablespoon Maple syrup or golden syrup
Instructions
- Mix the yeast, water, honey and syrups together and set aside
- In another bowl, incorporate the flour and the rest of the dry ingredients
- Pour the wet mix gradually into the dry mix and combine together
- Knead for long enough to get a smooth dough forming. If using a stand mixer with a dough hook, this should be no longer than 2 lots of 5 minutes
- Once incorporated, cover the bowl with a shower cap or damp cloth and let it rise until double in size
- Remove from the bowl, knock back the air out of it and then shape accordingly
- Place the shaped dough in the proving basket or greased bread tin. Let it rise for another 30 mins to an hour until proved
- Prior to baking, slice 4 to 5 slashes across the top of the bread prior to cooking in the oven at 200℃ for 25 - 30 minutes.

Notes
Nutrition
More posts like this
Comments
No Comments
Leave a Reply